Build an API using Firebase Functions for cheap Firebase Serverless Cheap API
When I am working on personal projects, I often find the need to setup an API that serves up data to my app or webpages. I get frustrated when I end up spending too much time on hosting and environment issues.
These days what I end up doing is hosting the API using Cloud Functions for Firebase. It hits all my requirements:
- Easy to setup
- Serverless so no hosting setup and zero maintenance
- Super cheap for low traffic projects
What is Cloud Functions for Firebase?
The official name is Cloud Functions for Firebase. In this article, I am going to call it Firebase Functions. This is mostly to distinguish it from Google’s other serverless function-as-a-service Cloud Functions. You can read more about the differences here. From that page:
You should use Cloud Functions for Firebase if you’re a developer building a mobile app or mobile web app. Firebase gives mobile developers access to a complete range of fully managed mobile-centric services including analytics, authentication and Realtime Database. Cloud Functions rounds out the offering by providing a way to extend and connect the behavior of Firebase features through the addition of server-side code.
While I’m not going to write a mobile app in this article, I like to use Firebase Functions because:
- The local development experience is pretty good
- Using other Firebase services like Firestore is easy to do
If all this isn’t confusing enough, Google is rolling out a new version of Cloud Functions called 2nd generation which is in “Public Preview”.
Assumptions
So in order to move forward, let’s identify our working assumptions:
We’ll be writing the API in Javascript or Typescript
If you need another language like Python, check out other options like my course Serverless Django with Zappa.
You have a working knowledge of API endpoints
You don’t have to be an expert, but we aren’t going into great depth in this article about API design or event build more than a sample API using Express.js.
We’ll just create a placeholder for you to fill.The amount of traffic to this API will be low and will fall under the GCP free tier
You can find out more about limits on the pricing page. But you will need to sign up for the ‘Blaze Plan’ which has a nominal cost of about $0.01 (for US, Canada, and India)
We won’t connect to a database…yet
At least not in this article.
Create a Firebase Project
- Sign up for a GCP account and upgrade to the ‘Blaze Plan’
- Navigate to https://console.firebase.google.com/ and click ‘Add Project’
- On step 1, enter a name for your project
- On step 2, disable Google Analytics for now, and click ‘Create Project’
- Once in the project, click on ‘Functions’ from the left menu
- You’ll have to click on ‘Upgrade project’ to enable Firebase Functions
- Note that you can set a notification warning when expenses go over a certain amount. If you follow this article, you should not be charged.
Setup the local environment
You’ll need to install the firebase tools globally Either by using
$ npm install -g firebase-toolsor using Volta. As a side note, using Volta will allow you to install global javascript tools as a non-root user. This is just my personal preference.
Start the firebase project by typing:
$ firebase initNext, you’ll have to choose from an list of Firebase offerings. For now, just select
FunctionsandEmulators.
Emulators will allow us to run our code locally for testing purposes.Then select “
Use an existing project” and select the newly created project.Select
Javascriptand no to ESLint for now.Select Yes to install npm dependencies
When asked which emulators to install, select
FunctionsUse the default port of 5001
When asked about the emulator UI, select No. We don’t need it right now and it sometimes is confusing. You can explore it later on your own.
Finally, you can download the emulator now.
After all this is complete, you should have a single file called firebase.json and a directory called functions. The functions directory is where we’ll write our API code.
Start the emulator
We’ll take the emulator out for a spin.
In the
functionsdirectory, open theindex.jsfile and uncomment the sample code:const functions = require('firebase-functions') // // Create and Deploy Your First Cloud Functions // // https://firebase.google.com/docs/functions/write-firebase-functions // exports.helloWorld = functions.https.onRequest((request, response) => { functions.logger.info('Hello logs!', { structuredData: true }) response.send('Hello from Firebase!') })On your command line, type:
firebase emulators:startYou should see something like:
i  emulators: Starting emulators: functions
⚠  functions: The following emulators are not running, calls to these services from the Functions emulator will affect production: auth, firestore, database, hosting, pubsub, storage
✔  functions: Using node@16 from host.
⚠  emulators: The Emulator UI requires a project ID to start. Configure your default project with 'firebase use' or pass the --project flag.
i  functions: Watching "/Users/newline/firebase-test1/functions" for Cloud Functions...
✔  functions[us-central1-helloWorld]: http function initialized (http://localhost:5001/firebase-test1/us-central1/helloWorld).

┌─────────────────────────────────────────────────────────────┐
│ ✔  All emulators ready! It is now safe to connect your app. │
└─────────────────────────────────────────────────────────────┘

┌───────────┬────────────────┐
│ Emulator  │ Host:Port      │
├───────────┼────────────────┤
│ Functions │ localhost:5001 │
└───────────┴────────────────┘
Emulator Hub running at localhost:4400
Other reserved ports: 4500

Issues? Report them at https://github.com/firebase/firebase-tools/issues and attach the *-debug.log files.
In the middle of all this text, find the localhost link. In this example, it’s “http://localhost:5001/firebase-test1/us-central1/helloWorld”. Yours will be different. Open the link in a browser. You should see:
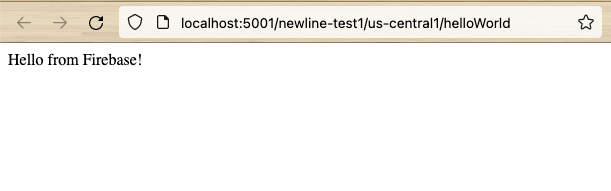
Congrats, you have Firebase Functions working on your local system! To exit the emulator, just type ‘Ctrl-C’ at your terminal window.
First Deployment
This is all very exciting. Let’s push our new “hello world” function into the cloud. From the command line type:
firebase deploy
The output should look similar, but not exactly to:
=== Deploying to 'newline-test1'...

i  deploying functions
i  functions: ensuring required API cloudfunctions.googleapis.com is enabled...
i  functions: ensuring required API cloudbuild.googleapis.com is enabled...
⚠  functions: missing required API cloudbuild.googleapis.com. Enabling now...
✔  functions: required API cloudfunctions.googleapis.com is enabled
✔  functions: required API cloudbuild.googleapis.com is enabled
i  functions: preparing functions directory for uploading...
i  functions: packaged functions (50.13 KB) for uploading
✔  functions: functions folder uploaded successfully
i  functions: creating Node.js 16 function helloWorld(us-central1)...
✔  functions[helloWorld(us-central1)] Successful create operation.
Function URL (helloWorld(us-central1)): https://us-central1-newline-test1.cloudfunctions.net/helloWorld
i  functions: cleaning up build files...

✔  Deploy complete!

Project Console: https://console.firebase.google.com/project/newline-test1/overview
And if we navigate to the Function URL we should get the ‘Hello from Firebase!’ message. Exciting!
Do you see how easy it is to create Firebase Functions?
Add the API part
We’ve done all the hard part of setting up our local environment and the Firebase project. Let’s jump into creating an API using Express
Install express:
npm install express
Next, edit the index.js file to look like:
const functions = require('firebase-functions')

const app = require('express')() // Note the shortcut here to get app initialized.  The extra ()

const testHelloWorld = async (req, res) => {
    res.send('Hello World!')
}

const testJSON = async (req, res) => {
    res.json({ message: 'You are awesome because you created an API', awesomeLevel: 9000 })
}

app.get('/', testHelloWorld)
app.get('/testJSON', testJSON)

exports.api = functions.https.onRequest(app)
Then if you run
firebase emulators:start
You can load up your api locally. Note the URL link on the emulator is a little different – it should have ‘api’ added at the end like:
http://localhost:5001/newline-test1/us-central1/api
You should see our ‘Hello World’ message. Now for more fun, add ‘/testJSON’ to the end of your link. You should see the browser return back JSON data that our API has sent:

Now finally, let’s deploy to the cloud:
firebase deploy
Note that when you try to deploy, Firebase is smart enough to detect that major changes to the URL structure have occurred. You’ll need to verify that you did indeed make these changes and everything is ok. Since this is a trivial function, you can type Yes. Firebase will delete the old function we deployed earlier and create a new one.
Once that completes, try to load the link and validate your API is now working!
Conclusion and Next Steps
This article has walked you through the basics of using Firebase Functions to host your own API.
The process of writing and creating a full featured API is beyond the scope of this article.
There are many resources out there to help with this task, but I hope you’ll think about Firebase
Functions next time you are starting a project.